Thursday, January 31, 2013

Honey Vanilla Orange Marmalade

We got a bit of honey from our bees last year and I thought it would be nice to pair it up with some orange marmalade.   And then I thought I'd jazz it up a bit more and add a vanilla bean.

Hello, Sunshine!    This is a brilliant improvisation on the marmalade theme.  It was easy, too.


Honey Vanilla Orange Marmalade
www.rurification.com

4 oranges, sectioned and zested
1 cup water
1 cup honey
1 cup sugar
1 vanilla bean [or a half if you want more honey flavor to shine through]

Zest the oranges first and boil the zest in the water and honey while you're sectioning the rest of the fruit.  Cut the vanilla bean in half and slice up the half to release the seeds.  Put all of the ingredients together in a large pot and boil until it reaches 220 degrees or the gelling temp you need for your altitude [see my Jam page, tab above, for that information.] Remove the vanilla bean.   Ladle into jars.   Process 10 minutes for canning. 


Note:  You can keep that vanilla bean and use it again, or you can drop it in a jar of sugar and let the sugar absorb the flavor.   That's what I do.   That sugar makes some amazing cookies.   And is great in tea.   Or in another batch of jam - like strawberry.  Mmmm.


Want the recipe for this Marmalade and a whole lot of other terrific jam recipes?   Check out my ebook:  A Simple Jar of Jam  at www.rurification.etsy.com.   You can preview the book by clicking the link on the sidebar.  Every purchase helps support this site.  Thank you!


Wednesday, January 30, 2013

Tornado Update: Updated

Update  11:30 am:    Eric drove Hwy 43 between Solsberry and Hendricksville and said all he saw was one house with a bunch of shingles blown off the roof.   No serious damage that he could see from the road.   His comment:  Hype.    

Whew.    Our neighbors don't need any more drama. 


Original post:  Looks like our little hamlet got hit by a tornado or a tornado-like weather phenomenon in the wee hours of this morning.   The damage seems to be between Hendricksville and Solsberry proper - about 6 miles away from us.    We found out about it when someone heard it on the news and called to check on us. 

We're fine.  The hives are fine.   The coldframes are fine.   The trees are fine.   The only thing that got knocked over was a grilling tool chest on the back patio.   Also an old wading pool got ripped off its heavily weighted bottom and crashed into the woodpile.   No wood was hurt, but the pool isn't really a pool anymore.

We even have power - a miracle in and of itself.   Our power source is located in the White River plain.   When the wind blows in Bloomfield, we lose power.    It flickered a lot last night, but didn't stay off long at all.  

Our place is in a little hollow and the winds go right over us.   Loudly.

Loud. Ly.

Seriously, it sounded like a tornado for four hours before the storm actually hit.   And I'm serious about the length of time.  Roaring winds. 

And I guess it did turn into a tornado.   Or a tornado-like weather phenomenon. 

But we're all fine. 


Blood Orange Marmalade


I scored some blood oranges this year.   Actually, Eric scored them.    He's my citrus shopper.


We made some plain blood orange marmalade because it was pretty.   Really pretty.   Once I got all the fruit in the pot, it looked like this.   

Really pretty.

And the finished jam is gorgeous.


Blood Orange Marmalade
www.rurification.com

5 blood oranges, sectioned and zested
2 cups water
3 cups sugar

I followed the same procedure as before [see the post from two days ago on Four Fruit Marmalade].   Zest first.  Boil the zest in the water while you section the fruit.  Put the fruit, zest and sugar in a big pot and boil it until it reaches the gel point [220 degrees in Indiana].

Ladle into jars.  Process 10 minutes for canning.  [See Jam page, tab above, for more information.]


I kind of let this get too hot and when it was done it was very gelled.   Which is fine at room temp.  Nice even.   But once it's been refrigerated, it gets hard.    Way hard.   So keep that in mind if you end up with some of this batch.   Keep it at room temp until you open it, then eat it all so you don't have to refrigerate it.   Okay?  


Want the recipe for this Marmalade and a whole lot of other terrific jam recipes?   Check out my ebook:  A Simple Jar of Jam  at www.rurification.etsy.com.   You can preview the book by clicking the link on the sidebar.  Every purchase helps support this site.  Thank you!


Tuesday, January 29, 2013

Ice

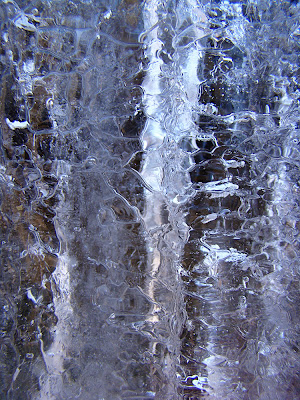
Lily collected these pics of the ice along the creek one afternoon, after it froze again after the flood.   It's really amazing how differently water acts when the temps get cold.  


Tiny bubbles.


Flat icicles coming off the rocks above.


It looks like a fossil or a petroglyph, doesn't it.


A large water meniscus between layers of ice.


These froze almost like scales.


Frozen ripples.


One of a set, clear as glass.

Amazing.

Monday, January 28, 2013

Four Fruit Marmalade

Remember all that fruit I zested for you the other day?   I used it to make Four Fruit Marmalade.

I used grapefruit, oranges, blood oranges and meyer lemons.

It is dee-licious.

You should make some.


Four Fruit Marmalade
www.rurification.com

2 grapefruit, sectioned.  Zest one of them.
2 oranges, zested and sectioned.
2 blood oranges, zested and sectioned.
4 meyer lemons, zested and sectioned.
7 cups of sugar
1/2 tsp salt [to cut the bitter]

Do your zesting first.   Put the zest in a pot with 3 cups of water, bring it to a boil and let it boil happily until you have all the sectioning done.

I use a serrated grapefruit spoon for the sectioning.  Just cut the fruit in half and go at it.   Pull the seeds out as you find them.

I sectioned all the fruit into a bowl.   Between the fruit in the bowl and the liquid in the zest pot, there were roughly 7 cups of stuff.  That's why the 7 cups of sugar.   If you make a smaller batch, just remember that you want about the same amount of sugar as you have fruit stuff.

Put all the fruit stuff and the zest stuff in a good pot with a wide bottom.  Add the sugar and salt. Bring it all to a boil.  There's no pectin in this recipe, so you're going to have to boil it down until the gelling point - 220 degrees here in Indiana.   Check my Jam page [tab above] for the gelling points at higher altitudes.  

Let it boil hard.    Mine boiled until the foam started creeping up the sides of the pan.   That's normal.   You might stir it once in a while to make sure it's not sticking.

When you reach the gelling temp, turn off the heat, ladle into jars, put the lids on  and process 10 minutes for canning.   [See my Jam page, tab above, for more information on processing for canning.]

Note:  If you use a pot that's too small, the jam will start to brown before it reaches the gelling point.   The sugars will caramelize before enough liquid boils out so start out with a good big pot.  It's OK if your jam is way down in there because the pot seems too big.   It isn't too big.  It's efficient.   Efficient is good.

I made a little extra of this marmalade because, guess what!

Under Indiana law, I am allowed to sell my jam now as a Home Based Vendor.   This means I have to label things with a specific disclaimer and I have to do pH testing of every batch, but that's not a problem.

How do you like the front side of my labels?


Want the recipe for this Marmalade and a whole lot of other terrific jam recipes?   Check out my ebook:  A Simple Jar of Jam  at www.rurification.etsy.com.   You can preview the book by clicking the link on the sidebar.  Every purchase helps support this site.  Thank you!


Sunday, January 27, 2013

Marmalade Tools


It's that time of year.   Time to raid the grocery stores of all that gorgeous citrus and make some marmalade.

I scored a nice selection of citrus this year and decided that I'd make a batch of  Four Fruit Marmalade to start things off.  [Recipes coming soon.]

Last year I tried Food in Jars' method of making marmalade.  She supremes her fruit.   This year I decided to skip the supreme-ing and just section the fruit with a grapefruit spoon.

Honestly, I liked the spoon better.   It was just as fast, too.   [The one in the pic is an old silver one I picked up at an antique mall for cheap.  I can never seem to get the tarnish all the way off.]


Which brings me to the rest of the tools I use when I make marmalade:  A sharp knife and a couple of zesters.

Because marmalade is all about the zest. 


I found a new zester this year.  The long one with the red handle in the pic above zests beautifully and quickly.  The zest is small, but not too small.


I like it a lot.  It's a KitchenAid medium grater.

This thing is really, really sharp.

Really sharp.  So be careful!


For longer zest, I use this little thing.  It's a 2 in 1 lemon zester.  There are bunch of different brands out there.

It takes longer to use but I like the longer confetti zest that I get with this.


Hold the fruit firmly in one hand.   Drag the zester along the fruit with the other, using your thumb for support on the back of the fruit.   This way you can get the job done pretty efficiently.

The larger blade to the side of the zester [pic above] is for when you want really big peels, like if you were candying lemon peel or something like that.


Once you've mastered these, then you'll end up with this. [KitchenAid medium grater]


And this. [2 in1 lemon zester.]

And then you're ready to make marmalade.


Want the recipe for Marmalade and a whole lot of other terrific jam recipes?   Check out my ebook:  A Simple Jar of Jam  at www.rurification.etsy.com.   You can preview the book by clicking the link on the sidebar.  Every purchase helps support this site.  Thank you!


Saturday, January 26, 2013

Even the Trash is Pretty

I've been making marmalade.   A whole series of posts is coming soon.   Very soon.
  
I love making marmalade.  Even the trash is pretty.   That's our radish greens in the chicken bucket with the zested orange peels.   The chickens love them.

Book Review: Winter Harvest

We have a cold frame that allows us to grow a 12 month garden.   It's a miracle.   See the search bar on the right sidebar?  --->   Do a search for cold frame and you can see what we've been doing with them for the past few years.

Because I want to increase our winter harvest, I picked up a couple of extra books to read up this winter.    I found a real gem!

The Winter Harvest Handbook: Year Round Vegetable Production Using Deep Organic Techniques and Unheated Greenhouses by Eliot Coleman  [photo from Amazon].

Did you read the part in the subtitle about unheated greenhouses?

Un. Heated. Greenhouses.

Since our electric bill almost doubled due to federal regulations [we live in a coal state], we're all over the unheated thing.   Which is why you're seeing a lot of posts about wood burning stoves, cold frames and unheated greenhouses.

The author, Eliot Coleman, operates a 12 month organic vegetable garden/farm in Maine.    They use a lot of horse poop and careful cultivation to keep the weeds down and they use low tech greenhouses to keep things going all winter long.

The trick is double covering the vegetables all winter, knowing what the sun is doing at your latitude, and knowing which vegetables to sow when.

The book describes in detail how to cover your beds and how to build inexpensive structures to do the job.    He describes in detail how to compost and what to use.    He describes in detail how to figure out what the winter sun is doing in your area  and how to use that to your advantage to figure out both fall planting/winter harvesting and early spring planting schedules.   

What I loved best is the whole discussion of when to plant things.   I had used my cold frames to grow things in the winter.    The problem is that there isn't enough sun for things to grow during Dec and Jan, and so things I planted in December [after the first harvest] weren't growing.    He explains that what you have to do is plant early so you can harvest all winter.    You're not growing things in deep winter, you're holding them stable for harvest all winter.   Which means I have to re-think how I plant in the fall and that I can plant a lot earlier than I thought in the spring - as long as things are under cover.   

I do know that the radishes we're eating this month are a whole different creature from the same radishes grown with the same seed planted in April.  And those carrots that tasted like trees in August - will taste a lot better in December.   Next year's winter garden will be a lot better.

If you are at all interested in 12 month gardening and harvesting, read this book.  

Friday, January 25, 2013

Garland's Barn

Garland's barn fell during the Big Snow. 

Old hay pulley


It sat up the hill from us, stately behind the trees. The spring and fall sun rose behind it, silhouetting it spectacularly.   She was a real beauty.

Well aged tobacco left from the last harvest, years ago.
She'd started out as a hay barn - the pulley is still there.  


For the last few decades she'd been used as a tobacco barn - the neighbors hung tobacco in there to cure over the winter.


Old tobacco poles sticking out of the wreckage.


We had a renegade llama at one point out here, but he was a wild thing and jumped the fences and eventually disappeared.  We figured a coyote got him.  One day, the neighbor went to check his tobacco and out of the blackness of this barn came running, right at him, our dark llama.    It like to gave him a heart attack. 

Bless his heart - he was laughing by the time he told us, but it must have taken a couple of years off his life.    Turns out that rotten llama had been hiding out up there for months.  Grazing in the hay field, drinking from the pond and sleeping in the barn.    We caught him and gave him away but that's another story.


When folks out here stopped growing tobacco, the barn was ignored, except for target practice now and then.


Mostly she rested. 


Now she's broken.

She's fallen. 


But she's as beautiful as ever. 

Thursday, January 24, 2013

Maple Glazed Pecans

One of the nicest things about boiling our own maple syrup is that we have plenty for cool treats like these glazed pecans.     Lily made them, put them out, and they were gone.   Gone. 

Maple Glazed Pecans
www.rurification.com

2-3 cups pecans
2 Tablespoons butter
1/2 cup maple syrup
3/4 cup sugar

Roast the pecans on a baking sheet for 10 minutes at 350 degrees.   Let them cool while you're making the glaze. 

Put the butter and syrup in a medium pan and bring to boil.   Boil for 2 minutes.   Reduce heat to medium low and add the nuts.   Stir to coat the nuts.   Add the sugar.   Stir to coat.  Spread them out to finish cooling and dry a bit.

Wednesday, January 23, 2013

January Mushrooms

We had the Big Snow.

Then it got warm and rained and it all melted.

Then it was 60 degrees and rained a lot more, hard, all in one evening.   We had a big flood during the night.


When we went out to check the damage the next morning, we discovered this on a willow stump next to our creek.    The temps were back down in the 30s by then, and it was gray and cloudy.  This thing glowed!

I think it's a fungus called Chicken of the Woods.  [Here's more on it.] It's supposed to be choice and delicious.   We're not very brave with our local fungus - morels and chanterelles are all we'll eat because they're all I can reliably identify.   I've heard of this one, and if I can get some trustworthy verification, I'll try it. 

It sure is pretty. 

Tuesday, January 22, 2013

Garlic Chives

It's time to plan your spring garden and start making those lists of things to add.  My favorite January activity is making the garden wish lists.

Here's an herb that we love having in the garden.

Garlic chives:  Allium tuberosum.

You can use the leaves all year long, like regular chives.  It blooms white in late summer and spreads like crazy.  It's a beautiful filler in the herb garden.  


Alliums grow from bulbs and they include everything in the onion family.    The leaves and flowers are edible.    

They have star shaped florets at the top of a stalk that comes up from the bulb.   

Garlic chives grow easily from seeds or from divisions of clumps of bulbs from an established patch like this one.  

This patch in the corner of my lower herb garden started as a single plant.   Now we have garlic chives in the neighboring beds, too.    They're easy to pull out where you don't' want them.    We prefer to let them wander. 

Monday, January 21, 2013

Sunday, January 20, 2013

Muffin Jam Cake

Here's another great recipe in our TTDWAJOJ [Things to Do with a Jar of Jam] series.  And it's simple.

Pull out your favorite muffin recipe and make up the batter.

Layer half of the batter in a cake pan.

Spread a jar of jam over it.  [You might have to stir the jam well to thin it out enough to pour/spread easily.] If you have some jam that didn't gel completely, this is a great way to use it.

Spread on the rest of the batter.

Sprinkle with chopped nuts and honey or your favorite coffee cake or fruit crisp topping.

Bake at 350 until done - 35-45 minutes depending on your pan size. 

We made this one with an oatmeal muffin recipe and put cherry vanilla jam in the middle with finely chopped almonds and honey on the top.  Mmmmm.

Saturday, January 19, 2013

January Radishes

I pulled these up out of the cold frame a couple of days ago.   There are still a bunch more waiting to be harvested.     I planted the seeds in October.

Pretty.

Ripples

The ripples are pretty.
Related Posts Plugin for WordPress, Blogger...