Friday, February 28, 2014

Rowboat

There are plenty of little ponds around here and many folks have small boats to paddle around in - especially if the pond is big enough for fish.   This boat had been pulled out for the winter.

I liked the blue against the orange grass.

Thursday, February 27, 2014

2014 Vegetable Garden Plan

I love this pepper!   We grew it in 2012.  Food just tastes better when it smiles at you.    Don't you think?

We actually had a thaw here, so it's time to get serious about the garden plan for the year.   


So, here's the plan for the year.   I'll keep you posted about how things work.    For more garden info, see the links in the sidebar and the Garden tab above.


Beans

  • Fava Beans:  Broad Windsor 
  • Red Chinese long beans - Got original seed from BC.  Now I use our saved seed.
  • Green Chinese long beans - Got original seed from BC.  Now I use our saved seed.
  • Dragon Tongue [our saved seed]  
  • Freshette green bean.  Got the seed from Rural King or Menard's.  I can't remember.
Beet:  Detroit Dark Red.   A rabbit or something got these last year, so I'm trying again - with fencing!
 
Carrot:  These will go in the cold frames as soon as the snow melts.     I'll plant them again in late August or September in the fall cold frames.

  • St Valery
  • Purple
Cucumber
  • Telegraph
  • Sikkim Cucumber:  We tried these from a farmer's market last year.  Weird, but good.
  • Boston Pickling Cucumber
Eggplant:  Two new kinds for us this year.  I might throw in a few of the Japanese Pickling, too. 
  • New York Improved eggplant
  • Ping Tung Eggplant
Fennel:  Di Firenze - likes cool weather.   Plant in fall for December harvest and in late Feb for spring harvest.

Flowers:  zinnia (liliput), calendula [and probably some cosmos.  I love cosmos.]

Greens:
  • Siamese Dragon Stir Fry Mix.  
  • Bibb Lettuce
Herbs, Annual:
  • Basil, Genovese
  • Genovese red basil
  • Basil, Lettuce Leaf
  • Cilantro, Slo Bolt.  Got original seed from BC.  Now I use our saved seed. Mostly it self sows.
  • Dill.  Self sows.  
  • Thai red roselle- new for us this year.    You make a red tea [tisane, actually] out of it.  It sounded fun.
Herbs, Perennial [planted several years ago]
  • Lavender:  My favorite is Impress Purple.
  • Thyme:  Pennyslvania Tea Thyme is my fave, but we have several others, too.
  • Sage
  • Horehound
  • Chives
  • Anise Hyssop:  I love it and need to plant more. 
  • Hyssop
  • Chamomile [self sows]
  • Alpine Strawberries
  • Clary Sage
  • Winter savory
  • Lemon balm:  Will take over.   Keep a tight reign on it.
  • Sorrel
Leek:  Autumn Giant Leek

Melon
  • Charentais [cantaloupe]
  • Uzbek Sweetness Melon
  • White Wonder watermelon
Onions
  • Egyptian walking onions:  They did not like the cool summer last year. Fingers crossed I still have some out there after this winter.
  • Yellow of Parma onion
  • Wethersfield red onion
  • Ishikura onion
Parsnip:  Half Long Guernsey Parsnip

Peas:   Sugar Snap.  Love these!   Heat tolerant.
 
Peppers -We're shooting for sweeter, meatier peppers this year.
  • Golden Marconi
  • Red Marconi
  • Melrose pepper
  • Jupiter pepper
  • Golden California Wonder pepper
Potatoes:  Kennebec  [or whatever is at Rural King]

Radish:   Early Scarlet Globe - the regular red kind.  Plant early and late in the cold frames.

Rutabaga: Laurentian Rutabaga  [First time with rutabagas]

Sweet potatoes:  Georgia Jet.  From our own starts.

Squash, Summer

  • Zucchino Rampicante - No new seed this year, so we'll try planting last year's seed and keep our fingers crossed.
  • Golden Marbre Scallop [pattypan]
  • Lemon Squash
  • Castata Romanesco [zucch type]:  Early set of fruit. Light.  Striped.  First one, June 30 last year.
Squash, Winter  [The last three are new, the others are from last year's seed.]
  • Australian Butter
  • Black Futsu
  • Greek Sweet Red
  • Golden hubbard
  • Honey Boat Delicata
  • Musquee De Provence
  • Queensland Blue
  • Rouge Vif D'Etampes
  • Boston Marrow squash 
  • Galeux d'Eysinee squash 
  • Delicata squash
Strawberries
  • June bearing [from May's]
  • Ever bearing  [from May's]
Tomato
  • Amish Paste
  • Amana Orange
  • Belize pink heart tomato
  • German red strawberry tomato
  • Uncle Mark Bagby tomato
  • Pineapple tomato
Turnip: Boule d'Or turnip

Wednesday, February 26, 2014

Marmalade Recipe Roundup

It's citrus season and that means it's marmalade season.   I love marmalade.  Nothing is as beautiful this time of year as a jar of citrusy sunshine.

I love marmalade on toast.   Also, on pancakes.  Also, on Blueberry Steel Cut Oats with yogurt.  Also, on ice cream.    Also, on brownies.   Also, on brownies with ice cream.  

I love marmalade!  

Here are a few tips and recipes to get you started.   

And once you have the jam made, here are some fabulous things you can do with it!

Orange Marmalade Cranberry Jammy Oatcakes

Eric's Jam Bars

Blintzes


Want the recipe for these Marmalades and a whole lot of other terrific jam recipes?   Check out my ebook:  A Simple Jar of Jam  at www.rurification.etsy.com.   You can preview the book by clicking the link on the sidebar.  Every purchase helps support this site.  Thank you!


Tuesday, February 25, 2014

2013 Garden Round-up


This is what we planted for 2013 and my notes on the varieties.    It was a weird year, last year.   Not harsh, but the spring was long - very long - and the summer was cool.  

Some of my tried-and-true varieties didn't like the cool summer.   Let's hope 2014 is a more normal summer.


Beans

  • Fava Beans - Broad Windsor  Changed my mind because of the late spring.  Planted extra peas instead.
  • Red Chinese long beans - love these!  They start fast and bear early.
  • Green Chinese long beans - love these!  They start slow and bear late, but are frost hardy in the fall.  
  • Dragon Tongue.  Fantastic fresh, freeze OK.  
  • Freshette green bean.  My favorite of all the beans we froze.  

Beet
  •  Detroit Dark Red - the rabbits ate them to the ground.  I didn't get a single one.   They seemed to start OK, so I'll try them again with extra critter protection.

Cucumber
  • Telegraph - long.   My favorite so far.
  • de Bourbonne [tiny ones] - seem to do better in a hot summer.  

Eggplant:  Bad year for eggplant.   Lots of flea beetles, too.
  • Japanese Pickling:  Did OK.   Usually does great and it loves hot summers.
  • Florida Market Eggplant-very sensitive to cold.  Lost the first batch of starts to a late freeze, even though they were in the hoop house.   Did a second batch of starts and put them in the ground at the end of May.   Got 1 single eggplant.

Fennel:  Di Firenze - likes cool weather.   Plant in fall for December harvest and in late Feb for spring harvest.

Greens:
  • Siamese Dragon Stir Fry Mix.  I mixed this half and half with more arugula seed.  Yum!
  • Bibb Lettuce-  Love this stuff and we had a lot of it in 2013.

Herbs, Annual:
  • Basil, Genovese. Water seeds daily until they sprout.Harvest frequently. 
  • Basil, Lettuce Leaf..  Water seeds daily until they sprout. Harvest frequently.
  • Cilantro, Slo Bolt. Mostly it self sows.  Comes up everywhere.  I love it.
  • Dill.  Self sows now. 

Herbs, Perennial [planted several years ago]
  • Lavender
  • Thyme
  • Sage
  • Horehound
  • Chives
  • Anise Hyssop
  • Hyssop
  • Chamomile [self sows]
  • Alpine Strawberries
  • Clary Sage
  • Winter savory
  • Lemon balm
  • Sorrel
  Leek:  Autumn Giant Leek.   I started them, but didn't get them in the ground in time to harvest.   Will do better in 2014.

Melon

  • Charentais [cantaloupe]- cat dug it up.  Will try again in 2014.
  • Uzbek Sweetness Melon - fantastic melon!   Will do these again.   Sweet!

Onions
  • Egyptian walking onions - don't like damp.   I hope they come up this year.
  • Local starts:  red and yellow sets
  • Australian Brown: Started in jugs in the hoop house in February and have lots of starts now. Didn't get them in the ground in time.   Will try again with fresh seeds.

Parsnip:  Half Long Guernsey Parsnip  [First try at parsnips.] - didn't come up.

Peas
  • Sugar Snap:   Hardy and prolific.  Heat tolerant. Love these!

Peppers
  • Golden Marconi - Great peppers.   The red ones did better.
  • Red Marconi - Great peppers.
  • Ozark Giant - Did OK, but not great.
  • Quadrato D'Asti Rosso - Didn't do anything. 


Potatoes:  Kennebec.   From May's [local].   Tried these in potato towers again.   Much better to just grow them in rows. 

Radish:
  • Early Scarlet Globe - the regular red kind.   Had great success in very early cold frame planting and and late fall cold frame plantings.

Rutabaga: Laurentian Rutabaga.   Did nothing. 

Sweet potatoes:  Georgia Jet.  From our own starts.   The deer liked these.   I fenced them out and the sweet potatoes were good. 

Squash, Summer
  • Zucchino Rampicante - Used saved seed.   These did fabulously!
  • Golden Marbre Scallop [pattypan] - Did well and seem to be somewhat resistant to vine borers.
  • Lemon Squash - Did well and seem to be somewhat resistant to vine borers.
  • Castata Romanesco [zucch type]:  Early set of fruit. Light.  Striped.  First one, June 30.  Loved these.

Squash, Winter

  • Australian Butter - Good fruit.   Will try again.
  • Black Futsu - excellent.  Prolific for us in 2013.  Great fruit.
  • Greek Sweet Red - one of our favorite. 
  • Golden hubbard - didn't do so well in 2013. 
  • Honey Boat Delicata - Good!   We liked these a lot and they're cute.
  • Musquee De Provence - Gorgeous and delicious.
  • Queensland Blue - I keep trying these because they're, well, blue.   We usually get one.
  • Rouge Vif D'Etampes - didn't get any.

Strawberries
  • June bearing [from May's]
  • Ever bearing  [from May's]

Tomato - not a great year for tomatoes in 2013.   Too cool.
  • Amana Orange Tomato - Good tomato.
  • Amish Paste - K2's favorite. 
  • Brave General Tomato - Did ok
  • Black Cherry Tomato - prolific.  Like these!
  • Hillbilly [Flame]- Did ok.

Monday, February 24, 2014

Mushroom Lace

I was enchanted by the backs of these mushrooms in the winter woods.    A little winter lace on a cold, cold day.

[I was so enchanted that I forgot to look at the fronts to identify them.] 

Sunday, February 23, 2014

Wood Stoves

We will be buying a wood stove this summer.   I've been doing a lot of research and we narrowed it down to these three:

Made in the USA to be one of the greenest stoves in America, the Encore® FlexBurn™ is unlike any other wood stove on the market today. It adapts to your lifestyle, so you can choose to operate in catalytic or non-catalytic mode.1. Vermont Castings,  Encore:
 $3250 - enamel finish.
Heats up to 1800 sq ft.
Medium sized firebox
27" (W)
25-3/4" (H)
22-3/4" (D)
Burn Time: 12 hours
Converts from catalytic to non-catalytic.
Lower ash pan that swings out from the bottom for clean out.
Top or front load, 22" logs
Small cook top already on - no conversion


$2350
Heats up to 1500 sq ft
Medium sized firebox
23.875" (W)
27.625" (H)
25.125" (D)
Burn time:  6 hours 
Front load, 16" logs
Automatic blower
Top lifts off so you can use firebox as cooktop.
Ash pan pulls out like a drawer


Starting at $2089
Heats up to 1500 sq ft
Small size firebox.
25.625" (W)
24.313" (H)
25" (D)
Burn Time:  9 hours
Side or front load, 18" logs
Cooktop under cover
Ash pan swings out?


A couple of weekends ago, in between snowstorms, we went to Economy Fireplace in Ellettsville, Indiana and took a look at them.  Jim Herbst spent a lot of time talking to us and explaining how things work and what all was on the insides of all the stoves we looked at. [Great guy!  Very friendly and knowledgeable.  He gave us a tip on gloves - Go get a pair of welding gloves; they last a lot longer than fireplace gloves.] 

We saw the Vermont Castings Encore up close and personal.  They didn't have the Yosemite, but they had something very similar by Quadra-Fire.  They had the larger Regency H300 instead of the H200, but it's essentially the same stove, just different sizes.  So, we feel like we have enough information to make a final decision sometime here soon.

It was interesting to see how the top load felt as opposed to the side load and front loads.  It was interesting to see the ash pan arrangements.   It was nice to see the finishes.   Prices differ depending on the finish - The Encore price up there is for the enamel finish. The Regency would cost more with the enamel finish and I'm not sure about the Yosemite, since they didn't have that one and I had to pull a price off the internet. 

Which do you guys like best?  

Saturday, February 22, 2014

Starting Seeds in Milk Jugs

Annual re-post:  Mini Greenhouse Seed Starters!   I love these and it's time to get them planted!


My genius friend Sharon told me about these a couple of years ago.    They're milk jugs.    You use them as mini greenhouses to start seeds in.   I use them for my peppers, tomatoes and eggplants.  

Start things early [in February, here] and they can stay all snug in the jugs until it's safe to plant them out in May.   In the meantime they can get big in these.

And they're double protected from goofy March weather because I keep these mini greenhouses inside the cold frames and hoop house where it's not going to freeze.

Genius, right?    I love them!


This is what you do.

Save your milk jugs.   Then cut them like this.  Cut all the way around but don't cut them under the handle.   This gives them a lid that stays on, but that you can bend open if you need to.

I cut them with scissors - just stab the scissors in right there under the handle and cut, cut, cut.


Then I poke holes in the bottoms using a skewer.  Or a screwdriver.   Or Lily's pocket knife because she always has it with her and my pocketknife is always in my purse.   Except for that one time that I took it out before I went on an airplane because I didn't want to be arrested for potential terrorism or have it confiscated because it's a cool little pocketknife. 

Poke lots of holes.  Maybe 8-10.

Usually I forget to poke the holes in the jugs until I have a couple of these full.   I hate that.   That's why I'm reminding you to poke your holes before you put the dirt in.

So don't forget.  

Then I fill the bottoms with this stuff.  From right to left:   chicken dirt, sand, potting soil. 

I love chicken dirt.   You can read about it here and here.

In this order, I put in 2 scoops of chicken dirt, 4 scoops of sand and 4-6 scoops of potting soil.

Or you can use plain old dirt.   It works too.


Then I plant my seeds and put labels in the jugs.

Don't forget the labels.   If you grow 6 varieties of peppers, you'll want to know which one is which.   Or not.   It might be fun to plant a big row and see what's what later. 

I spray everything down really well with a spray bottle full of water and I bend the lids back over to close them up so they stay nice and snug and then I tuck them in the cold frame or hoop house. 

Check them occasionally to make sure they don't dry out too much.    Seeds do not like dry.   Keep them moist.

This will give you a nice head start on veggie production for the season.   That's important when you have a kid whose only vegetable is tomatoes.   

Friday, February 21, 2014

Brush

This brush sits on a small wall, outside the old well/pump house where my neighbor's house used to be.    It's been there for a very, very long time. 

I liked the shape and the soft weathered colors against the stones.

Thursday, February 20, 2014

Eric's Quinoa and Sausage Crockpot Stew

Eric gets full credit for this fabulous dinner.   We all loved it - and,  and! - it was a crockpot thing so we threw it in the pot, covered it up and went into town between snowstorms.  

Awe.  Some. 

It's a hearty blend of quinoa and beans, gussied up with carrot slices, onions and garlic and a pinch or two of garden herbs.   

We liked it thick as a stew, but if you added extra water or broth, it would make a terrific brothy soup, too.  

Eric's Quinoa and Sausage Crockpot Stew
www.rurification.com

1 lb sausage, crumbled, browned and drained
4 cloves garlic, minced
1 onion, chopped
1 can black beans
1 can great northern beans
2 chopped carrots [or more!]
5-6 cups water
1 3/4 cups mixed quinoa, well rinsed
3 chicken bouillon cubes
1/4 tsp dried thyme
1/4 tsp dried oregano
1 bay leaf

Cook up the sausage with the onion and garlic.  Drain the fat off and put in the crockpot with everything else.   Cook 6-7 hours on low.    If your quinoa takes up too much water, add more.   You can add extra water or broth to make a thinner, brothy soup.    Add a few stalks of celery for you celery lovers out there.   It's pretty hard to go wrong here.

A note about quinoa.  We get red, black and white quinoa from our local international market [Sahara Mart] in the bulk section.   Then we get home and mix it all together and store it in quart jars.    We like the white quinoa by itself in some things, so we always buy extra of that and leave a jar of plain white, too.     

Rinsing the quinoa is very important!    I drop it in the bottom of a large soup pot and run water over it until the pot fills.   Then I stir it around.   The water will cloud up, but the quinoa will settle pretty quickly.    I pour the old water off and do it all again two or three times.   If your pot is the right height [tall!], you can just run a constant gentle stream straight in the pot and the quinoa will stir up, but stay in the bottom with the flow while the old water pours out the top.     You can also bundle it and rinse it in a towel or several layers of cheesecloth or a fine mesh strainer.    Whatever works.


Wednesday, February 19, 2014

Maple Syrup: Tapping the trees

Annual re-post.    Rumor has it that it will actually get above freezing and stay there for a few days.   The sap should fairly shoot out of our trees.   It's tapping time!

We made our first maple syrup from our own trees in 2011 and discovered that it's not hard at all.

What you need: drill bit, taps, collection system [bag, bucket & tubes, etc depending on how you want to do it.  We use bags.], maple tree at least 10 inches diameter at 4.5 feet off the ground.   We got the taps and collection system from Leader Evaporator Company.  They've got tons of stuff for all types of collection and evaporation and you don't have to spend a fortune.


1.   Use the same size drill bit as taps you have. [We have 7/16 inch taps]  Drill 1.5 inches into the tree.    Wet maple is not easy to drill into so Eric used a smaller bit first, then used the big one to finish it. 


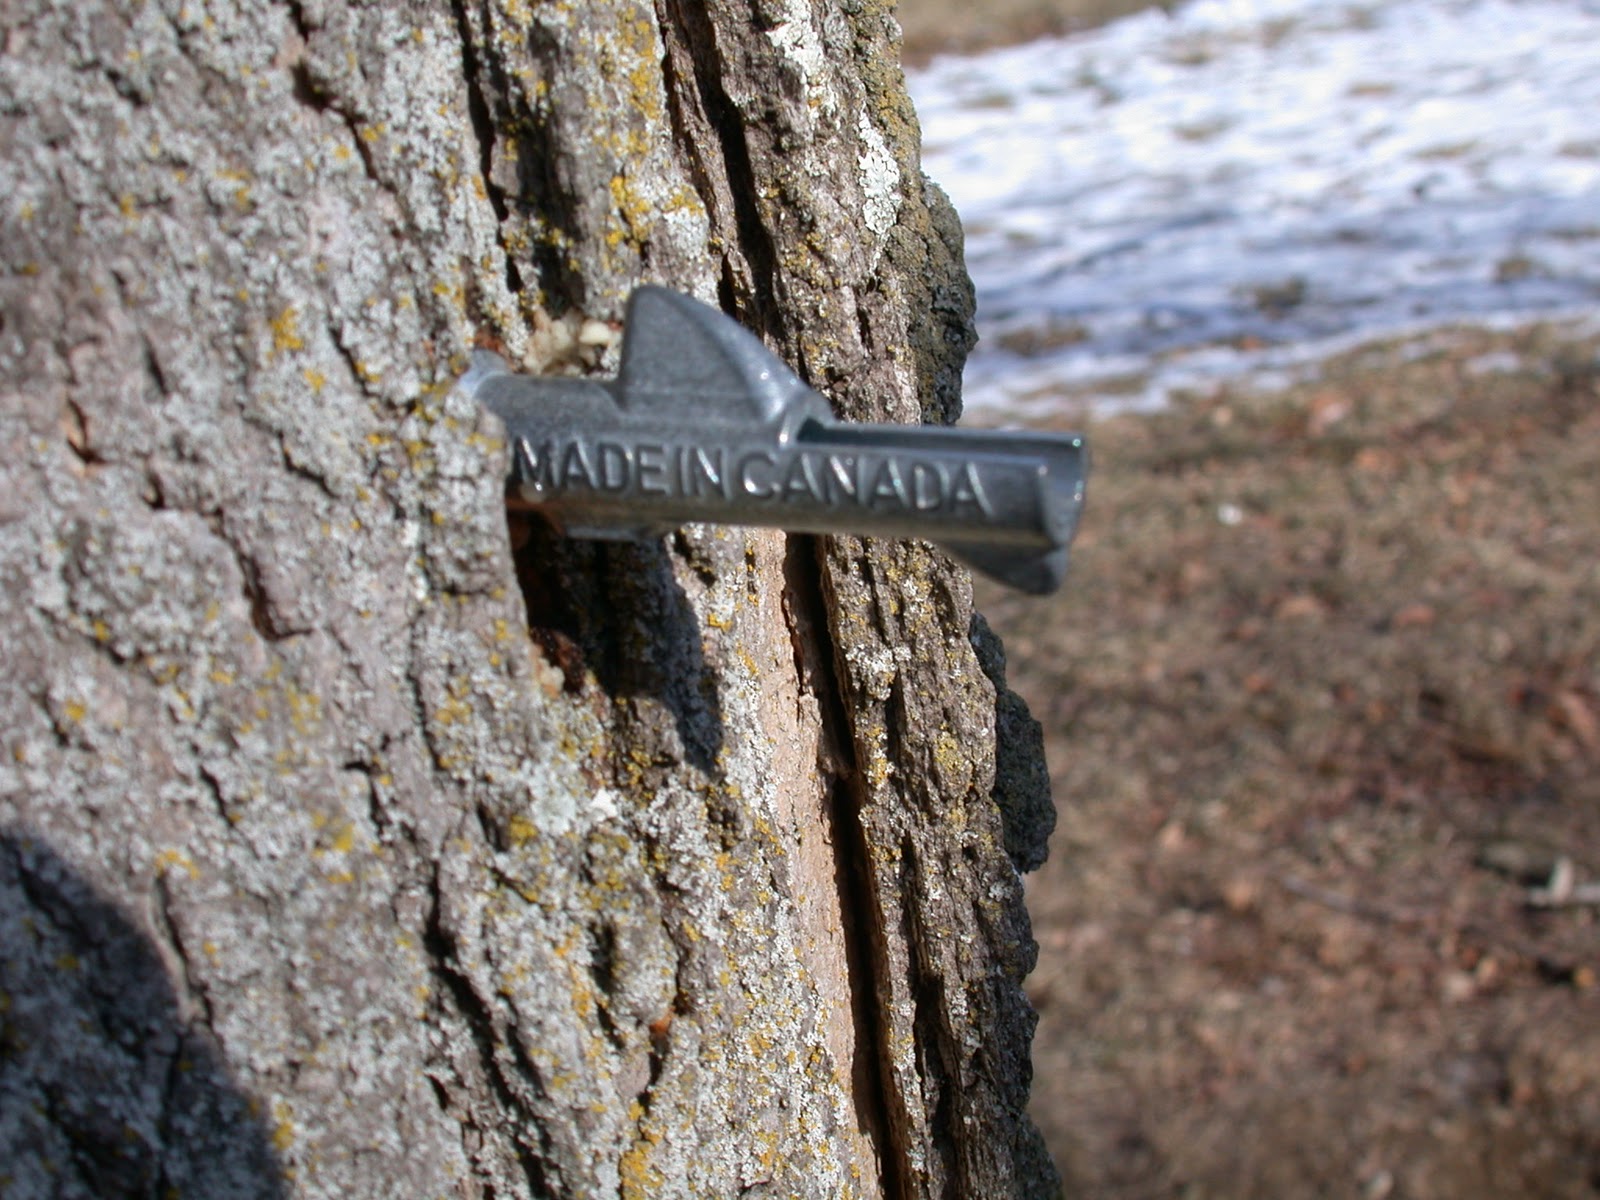
2 .  Put the tap in so the hook is at the top.   You can use a hammer to tap it into place.   We have 7/16 inch taps from Leader.

3. The bags and bag holder.  The sack holder comes in two parts: a ring and a holder. Notice the hole on the side of the bag holder. That's where you'll put it all on the tap on the tree.


4.  Put the bag on the ring from the inside and then fold the edges down over the outside of the ring.


5. Slide the ring inside the holder; make sure the ring is secure.


6.  Put the hole in the holder over the tap.   The hook on the tap will keep it all there, even when the bag is full of sap.

7.  Gathering:   This time of year the sap runs fast.   Keep an eye on it.   We empty everything into food grade buckets in the morning and in the evening.  You can keep the full buckets outside out of the sun in cool weather until you're ready to boil, but they can sour, so boil as quickly as you can.   The ratio of sap to syrup is 40:1, so one five-gallon bucket will give you about a pint of syrup.   We're going to shoot for a whole gallon of syrup this year.   That'll be about 40 gallons of sap - 8 buckets.

For more great info on how to tap your trees, check out the University of Maine's page.    In a week or two I'll post on the evaporation process; it's an outdoor, open fire activity.  [You don't want all that water vapor in your house.]

Tuesday, February 18, 2014

Big Square Rock, Round Hole


This has been stuck in the neighbor's yard for decades.   I have no idea what it was to start with, but it makes me smile.   The colors really show up this time of year.

Any ideas what it is?

Monday, February 17, 2014

Frozen


These are sycamore balls [seed puffs] trapped in the ice of our creek.   I thought they were cool.   And the ice is pretty, too.

If I squint my eyes and try really hard, I can pretend it's July and these are black eyed Susans.  

Sunday, February 16, 2014

Waterfall

Not too far up our creek is a waterfall that drops off the hill into the creek.  It is spectacular this year.  

I braved the brambles and barbed wire and iced over creek to go get these pics.   I'm so glad I did because it's even more spectacular when you're up-close and personal.


Click these pics to blow them up so you can really appreciate how wonderful all this ice is.
 
Ice sheets and stalactites - but behind them in the cliff face are beautiful columns of ice.


No words.   Blow it up and just wander around in the pic for a while.  


At the top of the waterfall is a large piece of shale overhanging the fall.   The roots of the tree above have anchored it in.   The water is wearing away the rock layers around that shale.  Someday that tree will come down and take a whole lot of rock face with it.


Saturday, February 15, 2014

Natural Yeast and Commercial Yeast Experiments

Eric made this beautiful bread with 2 cups of natural yeast and only half as much commercial yeast as a normal recipe called for.   [The recipe made 3 loaves - it's the baguette recipe from the book below. Bread snobs know from the pic it's nowhere near the traditional stuff, but it's delicious.]

So far we're loving bread this way.   I like the taste of natural yeast and we're getting a good rise with much less of the commercial stuff.

Eric's favorite bread book is The Bread Book, by Linda Collister and Anthony Blake is out of print and dirt cheap on Amazon.   He likes it for the instructions and for the range of recipes.   

Friday, February 14, 2014

New Seeds!


A few of the seeds I ordered for this year's veg garden.   I ordered from Baker Creek [www.rareseeds.com].

I'm going to try turnips this year among other things.    Last year was not a good year for my garden - poor strawberries, poor tomatoes, poor eggplant, etc.

I was thinking that the best eggplant are probably grown in the south, where it's good and hot and there's a very long season.   Then I heard a rumor that most of the world's eggplant is produced in New Jersey.   I checked the zone map here to find out what zone they mostly are. Most of New Jersey is in zone 6.    Interesting.  Perhaps it was just a good year for bugs last year and not a bad year for eggplant.   Given the cold we've had this year, I'm hoping the bugs are taking a good beating and that my veggies will do better.

Assuming it ever gets warm again, what will you be growing this year?  

Thursday, February 13, 2014

Milkweed Pods


We have a lot of milkweed out here.  In the fall the seed pods dry up and open and the seeds and fluff fly around. It's wonderful.

These particular pods didn't mature fast enough to disperse before winter.  I thought they looked interesting against the snow.

Wednesday, February 12, 2014

Chocolate Cherry Jam

There's something about Valentine's Day that just screams chocolate to me. 

CHOCOLATE!!

Last year I made three chocolate jams using chocolate bars, chocolate chips and cocoa powder as I was making the jam to begin with.  [btw:  chocolate chips are the easiest way to put chocolate in your jam.]

This year I wanted to try chocolate cherry, because it sounded good.  [So, I saved a jar of my cherry jam from last year just for this very reason and I had to defend that jar all year long from nameless people who live here with threats of  No Jam At All Ever Again if anyone touched my last jar of cherry jam.  It worked.]

I especially wanted to see if I could take a jar of jam already made and turn it into chocolate jam pretty easily.   

Yep.   I could. 

And I'm telling you, this stuff on bread is To. Die. For.   It's the bread and chocolate thing on a whole 'nother level.     Drumroll, please.....

Chocolate Cherry Jam
www.rurification.com

1 jar cherry jam [8-12 oz, whatever]
1/4 cup chocolate chips

Put the jam in a bowl with the chocolate chips.  Microwave for 1 minute.   Stir until smooth.

The End.

Really.   That's it.  

I know!

I know!

Why didn't I think of this sooner??

Don't stress out about the exact size of jar.   If there's more or less jam or chocolate, no one will care. 

You could do this with orange marmalade.   Raspberry jam.   Pear ginger jam.   Strawberry jam.  

You guys!!   Breakfast.  Valentine's Day. 

If you want the recipes for the jams I made last year, here ya go:

Chocolate Pear Ginger Jam
Chocolate Orange Jam
Chocolate Raspberry Jam


Want the recipe for this Chocolate Jam and a whole lot of other terrific jam recipes?   Check out my ebook:  A Simple Jar of Jam  at www.rurification.etsy.com.   You can preview the book by clicking the link on the sidebar.  Every purchase helps support this site.  Thank you!


Tuesday, February 11, 2014

Thawing Ice


The spring thaw can't come soon enough for me this year.  I'm ready to start thinking about maple syrup and gardens.  In the meantime, I noticed this spot in the creek one warm-ish day where a spring must have been warming the ice from below and it thawed in this one spot.  I liked the look of the layers and cracks spreading out. 

Monday, February 10, 2014

Wreath


We use a lot of barbed wire out here.  It does an OK job of keeping the animals in.   That rusted stuff is easy to find wherever the old fence rows are.  It's one of the reasons we never go bare foot around here.  The other reason would be all the multiflora roses.   It just pays to keep your feet covered.

A neighbor was replacing some fencing and I thought it was nice of him to leave this little wreath on one of the posts.  

The original shabby chic.

Sunday, February 9, 2014

New Soap Mold

While I was reading this book, I noticed the author's  handy-dandy soap mold.   Way cool.   Right now we pour soap into round molds made of PVC.    We have set up a good system and can turn out a pretty nice finished bar of soap in a half moon shape.  

But I've been hankering for a box mold so that we can make some layered soaps like the ones in the pic, here.    They've got vanilla soap on the bottom and mint on top.   The vanilla will get darker over time and they they'll be two-toned bars.    They smell great!

I mentioned it to Eric [read:  Honey! I think we need one of these.  Soon!  It's chemistry.   It's school.  It's math.  It's geometry.]   So we talked over the design and he bought a couple of hinges and disappeared into the basement and came back with a handy-dandy wooden mold that opens on the sides so you can pop the soap right out.


I.  Love.  It.


Here's one end from the top.   You undo those hooks to drop the sides.   We saw a plan that holds things together with velcro, but soap making is messy and none of us wanted to mess with washing the velcro.


Here it is from the top with one of the sides down.  

Sweet!


And here it is on its side so you can see the hinge on the bottom.   Notice the extra wood on the bottom.   That pops it up so that the sides drop down completely flat on the table.   It makes life easier when you're popping the soap out.  


Eric made the mold big enough for one of my 6 lb batches of soap.   It makes nice big bars.  We line it with freezer paper [shiny side up] before we pour the soap in and then cover it with towels when we're batching a cold process recipe. 

Now it's easy to make those layered bars of soap.   Thank you, Eric!!

Saturday, February 8, 2014

Hot Process Soap Making Saves the Day

As I mentioned in yesterday's post, we've been making soap for many years using the cold process method of saponification.  You mix up your oils and lye and then pour it into a mold and let it cool slowly over a couple of days, then it finishes saponifying over the next few weeks.

I had heard about hot process soap making but never tried it before, so when I found Delores Boone's book Handcrafted Soap, which is all about hot process soap, I was excited to try it out.

It's easy.

EASY.

You make soap the regular way, then there are three options for heating for the final cooking:
1. Crock pot on LOW.
2. Stove top double boiler.  Temp should be high enough to maintain a slow boil of the surrounding water.
3. Oven on 180-200 degrees.

Decide what method you're going to use to heat the soap to cook it [above].    If you decide on methods 2. or 3. then use stainless steel or enamel pots.   Stainless steel is best.   Soap making is very hard on enamel pots. 

You can mix your lye and oils right in the pot you'll use to cook it in.  So nice!

Mix the oils and lye to trace [thick as gravy], add your color or botanicals.   Wait to add your scents until the end of cooking.   Put the soap in the heat source and check it every 15 minutes or so.  

1.  Crockpot: LOW.  1 hr. A large wave will start at the side and curl up toward the center.   When the wave has completely submerged the center 'island', the soap is done.   Shiny wet areas are glycerine.  You can stir it in.

2.  Double boiler:  Temp should be high enough to maintain a slow boil of the surrounding water.  45 minutes or so.  Stir every 15 minutes.   The outsides will start to curl in toward the center. When it looks translucent, but not wet after you stir it, it's done.   To make sure, carefully touch some of the soap on the spatula or spoon [It's HOT!] and rub it between your fingers.  It should not be gritty.  Keep cooking until it's smooth.

3.  Oven:  180-200 degrees.  30-40 minutes.  Check it every 20 minutes or so.   When the soap is translucent and wet looking on top [that's glycerine], the soap is done.

Once your soap is done cooking, you add the scents and stir and stir and stir to cool it down slowly.   Boone says to use a spatula and fold the soap over and over and over.   When everything is mixed up well, it will have the consistency of mashed potatoes and you can put it into molds to shape and to finish cooling.   

Once the soap is cool, you can use it right away.  

I had a bad batch of shortening that was making my soap do funny things and I used the hot process method as a way to save a batch of what had been going to be [past perfect future infinitive verb tense, in case you wondered] a simple cold process batch.   When the mix grained and went very thick immediately, I poured the whole batch into my slow cooker, turned it on LOW and used a hand blender to blend it until it looked smooth.  It was slow careful work.   Blend for a slow count of ten, then stir with the blender off for a bit so the motor didn't overheat.   As soon as the mixture looked smooth, I covered the crockpot and waited.   

Saved!  It totally worked!   The mix curled just like she said it would.   After an hour, it was done and we put in the scents and stirred and stirred.   When it was thick enough to spoon out like mashed potatoes, we put spoonfuls on freezer paper [shiny side up] like cookie dough and let it cool some.   When it was cool enough to handle, we put two of those 'cookies' together back to back and formed them into balls as well as we could. [Photo above!]  They're not beautiful, but they're fun and it saved the batch of soap.  K2 used the soap that night.   It's wonderful.  

This was a very fun way of making soap.  Perfect for last minute soap projects.  Instead of waiting weeks, you'll only need to wait a day to finish it.  We'll definitely do hot process soap again.

Friday, February 7, 2014

Soap Book Reviews

I've been making soap for years using a cold process method.  There were just a few books on the market when we started making soap but there are several new books out there now and I realized it was time to check them out.  So much fun to read through a pile of new soap books!  I liked these two the best.  Soap Crafting, and Handcrafted Soap. 

For those of you new to soap making, let me answer a couple of questions first.

'Melt and pour' is when you buy pre-made soap, usually clear glycerine soap, at your local craft store and then all you have to do is melt it, add some color and scent and pour it into fun molds.  Easy.   These books aren't about that.  They are about making cold process and hot process soap.

Hot process and cold process soap making start the same way:  with oils and lye.   You start by mixing the lye into water and cooling it to under 120 degrees.  You melt your oils together and cool them to the same temp as the lye solution.   Then you mix them together to make your soap mixture. 

Cold process is when you pour the new soap mixture into a mold and let it cure slowly on its own.   You can unmold it after a couple of days, but saponification occurs slowly over the next few weeks.

Hot process is when you pour the new soap mixture into a slow cooker or pot and heat it up to quickly finish the saponification process in an hour or so.  

Soap Crafting: Step-by-Step Techniques for Making 31 Unique Cold-Process Soaps is a new book on cold process soap making that takes you through the basics and then shows a bunch of beautiful techniques for how to mix colors and make your soaps fancier. It was written by Anne-Marie Faiola, the Soap Queen, who has a terrific blog and who owns Brambleberry, an excellent (if pricey) source for soapmaking supplies.  The book is clear, beautiful and excellent for beginning and intermediate soap makers.  There's a good list of ingredients and a troubleshooting section.  It's got a spiral binding that allows you to open the book and keep it open while you're working.  I love it!  I've put this book on my book widget [See BOOKS tab above], too, if you need to find it later.

The second book Handcrafted Soap is all about hot process soap making, something that I had never tried. This book is by Delores Boone, who has done a great job of introducing soapmaking for beginners who want to finish it quickly by heating it at the end. There's a good description of oils, the basic process and the finishing processes. A great book for people who want to use the hot process method. Only one problem. The book is now out of print and it is way too expensive. I include the link here only so you know what book I'm talking about and so you can keep your eye open for it at used book places. It's definitely worth a few bucks to put in your how-to library, but not more than that.  The process is EASY.   I tried it right away and will give you a report tomorrow.

Thursday, February 6, 2014

Snow and Lichen


I love the look of these lichens.  They're everywhere here.  On the trees, the stones, the garden sculptures, the ground.  In the summer they look pale and ghostly, but in the winter, those soft blues and greens shine.   I liked the colors of these lichens with the oak leaf against the snow.  
Related Posts Plugin for WordPress, Blogger...