Monday, March 31, 2014

My Crop Rotation


If you have read yesterday's post with the links on crop rotation, you  will have noticed that it's as much about art as science. 

In addition, if you've compared the rotation lists with the companion plant lists from a few days earlier, you might be thinking there's no way to consolidate all that information into one easily executed plan.

You're not alone.   I feel that way, too.  

Start simple.   Choose the tack you want to take first [Companion plants?   Rotation?].   Do just one new thing every year and let yourself get used to it.  Keep a few records and re-evaluate next season.

Here is how I rotate my beds.   Last year I had things planted this way.
1.  Tomatoes, eggplant
2.  Potatoes
3.  Summer Squash and melons
4.  Peppers, fennel, basil
5.  Beans
6.  Winter Squash

Every year, I move things down one number.  So, this year I'll have things planted this way:
1.  Winter Squash  [heavy feeders]
2.  Tomatoes, eggplant
3.  Potatoes
4.  Summer Squash and melons  [heavy feeders]
5.  Peppers, fennel, basil
6.  Beans

If you read through any of the links above, you'll notice one big family missing in my garden:  brassicas [kale, cabbage, Brussels sprouts, broccoli, etc.]    Our cabbage worms are so bad here that I quit trying to grow brassicas.   I'll try again when I can find some row covers.  In the meantime, I just leave them out of the rotation.

I know that the two squash beds are heavy feeders, so every fall, I dump a lot of chicken dirt on them for the winter. In the spring I dig it in deep.   The rest of the chicken dirt goes in a compost pile for the winter and in the spring I use that to top dress all the rest of the beds.  [Top dressing is just sprinkling compost around in a thin layer on top without digging it in.]

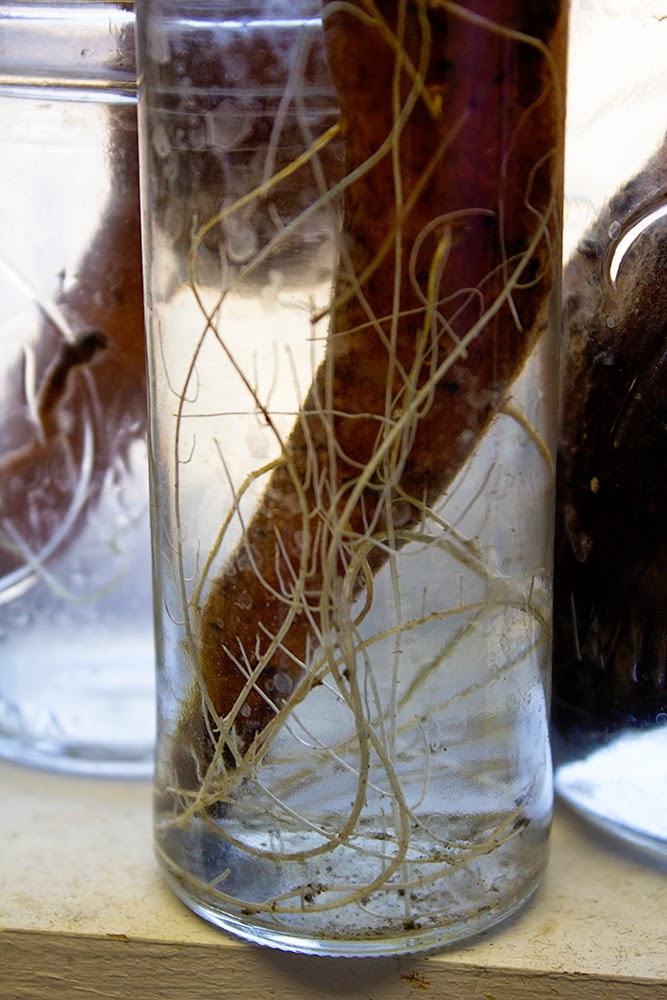
I do have a couple of permanent beds:  sweet potatoes, asparagus, strawberries, rhubarb/peas/cukes.   They are not rotated because they are either perennial plants or because the beds have permanent structures made especially for those crops.  For example, the sweet potato bed is extra deep and the peas/cukes bed has trellises.   These beds get well fed every year since I can't rotate them.   

To top it all off, I take 2 beds in the fall and plant them for winter.  I've been planting where the tomatoes were and where the summer squash were.  That might change this year. 


Sunday, March 30, 2014

Advanced Vegetable Gardening - Crop Rotation

The past two days I've talked a bit about companion plants - plants that encourage growth or bearing and will increase your garden yield or inhibit pests.

Another handy tool to have in your gardening belt is the concept of crop rotation.   Early on, farmers noticed that if you plant the same things in the same spaces year after year, then the soil would become depleted and problems would arise.    Heavy feeding helped and crop rotation helped. 

If you don't have separate beds for things, you can rotate areas.  And if you have only a couple of beds, then you can divide them in half and rotate that way.

If you're new to the whole idea of crop rotation and want to give it a try then here are some charts to get you started.  

If you have taken the time to read some of those links, you'll have noticed that there are several approaches to grouping plants for rotation.   Remember - gardening is as much art as science.  Choose the grouping that works for you and just go with it.

Saturday, March 29, 2014

Companion Plants, Part 2: Herb Companions

Yesterday I gave you a couple of terrific links to lists of vegetables that grow well together.  Today I've got links that talk about companion planting herbs and vegetables.   Herbs have the added benefit of repelling certain insect pests as well.

If you're a rank beginner, here's a basic list of 11 herbs to help your garden:  http://www.motherearthliving.com/in-the-garden/companion-planting-herbs-to-help-your-garden-grow.aspx#axzz2wyeOtpvv

Here's a list of herbs and the insects they repel.   Read the whole article - but the insect/herb chart is at the bottom: http://www.homeherbgardenanswers.com/cottage-garden-plants/  

I really liked this list of herbs and companions by Darlene Widirstky from http://www.n8ture.com/herbalcompanion.html

Here's a mixed list of herbs and vegetables put out by Wasatch Community Gardens:  http://wasatchgardens.org/files/resource/attachment/Beginning%20Organic%20Gardening%20Resources_1.pdf

And another mixed list of herbs and vegetables put out by Earl May:  https://www.earlmay.com/media/cms/companionplantschart_25D154AE91635.jpg

If you spend some time with this, you'll see that everyone has a slightly different take on it and you may even find some flat out contradictory information.   Don't worry about it.  Just take your best shot and enjoy growing your own food.


Friday, March 28, 2014

Companion Plants, Part 1: Vegetable Companions

I just got some asparagus for a new asparagus bed.   The thing about asparagus is that it's done in the spring and then sort of a 'waste' of space the rest of the garden year, so I've been wondering what I should plant in the bed with it so I can get the best use out of the space all year long.

Which brings up the issue of companion plants.  Some plants do better when planted next to each other and some don't.   But which?   I found these two great charts online while I was researching. 

Both of these charts are excellent and focus only on what vegetables to plant together.  

Mysquarefootgarden: color coded vegetable companion plant guide.  I liked this chart because the colors make it easy to find plants that work well together.

Wiki: http://en.wikipedia.org/wiki/List_of_companion_plants.  I know a lot of people roll their eyes at wiki, but this is a real gem.  It's a fantastic list of plants to use together and plants to avoid and most things are referenced with footnotes in case you want verification.  

I'll talk about companion planting with herbs tomorrow.

Thursday, March 27, 2014

Shell-less Egg

Our mystery chicken laid a completely shell-less egg this week. 

That is a very soft, membrane only egg, the size of a large grape.

We dissected it, of course.


Inside, we found another membrane covered egg sac, surrounded by egg whites only.

Inside that little one, we found egg whites only.

Weird.

Wednesday, March 26, 2014

Maple Syrup

Like everything else this spring, the sap run has been weird.  We got a great flow - late - then all the sudden it stopped, even though the conditions were near perfect [below freezing during the night, warming in the 40s during the day.]    I got about 30 gallons of sap and we ended up with about 7 pints of syrup.

It's a pretty color this year.

Tuesday, March 25, 2014

Canned Carrots

I've been reading Hickery Holler Farm's blog and she cans *everything*.  She said to watch the sales and fill up those emptying jars with cheap winter produce.   Carrots are super cheap this time of year.   We've been getting 5 lb bags of carrots for a couple of dollars at Sam's.

I thought it would be a good idea to can some up to see if we'd use them that way through the year.    You know, to dump in soups, or for glazed carrots [instead of sweet potatoes], and in carrot cake.

Since carrots are a low acid food, I used the pressure canner to can them.    As you know, I'm just getting to know my canner.  Slowly.   Only a couple of things each year, mostly tomasqua and pumpkin.  Last year I used it for green beans, too.  I am happy to say that I'm slowly getting the hang of it. 

My goal this year is to do a few jars of new things so I can get really comfortable with the pressure canner. 

Basically the process is this:
  • Fill up the jars and put them in the canner.
  • Add a couple of inches of water to the bottom of the canner.
  • Close the lid tightly and heat to boil [9 on my stove]
  •  Let vent for 10 minutes then put jiggler on. [10 lbs for carrots]
  • When the jiggler makes noise start the timer [25 minutes for pints of carrots] and you can drop the temp down to medium/high [6.5-7].  It should jiggle once a minute or more.
  • When the processing is done, turn the temp off and leave everything alone until completely cool.   Don't touch the jiggler. 
  • When completely cool, open the canner, wash the jars and you're done. 
It sounds complicated but it's not bad.   I keep a little list of instructions close by and the more often I do it, the more natural it seems.  It's worth it to be able to can squash and carrots and beans.

Note:   Pressure canning is not something I can do in very large quantities.   I get the best results [no siphoning] when I do enough for only one canner load a day.   Things siphon when I try to move things along too fast or take the jiggler off right away, etc.    If I just do one load and leave it to cool overnight, then I have very little siphoning, and that makes for happy food and a happy canner. 


Monday, March 24, 2014

Scilla


Not a great pic, but these blues make my heart happy.  

This is the first one up this year and it's trying to open even before it's fully emerged.   The bees will be all over it as soon as they can.  


Sunday, March 23, 2014

In the Doghouse

This is Bob.   He's our favorite rooster.   Gentle, quirky, cheerful.

Unfortunately, we got another rooster as a chick 2 years ago [we had paid for all females, so we were irritated, but unwilling to eat him. Yet.]  The new rooster is Nutmeg.  This year, Nutmeg has overturned the status quo and poor Bob has been ousted from the flock.    Either that or fight to the death.   Not nice options.


We separate Bob out first thing in the morning and let him range around the yard.   He goes where he wants and hangs out all over the place.  [At night he puts himself up and Nutmeg doesn't seem to challenge him after dusk.]

It irritates Nutmeg to see Bob free, and quite honestly,  I'm OK with that. 


Sometimes, Bob and a chicken buddy hang out in the doghouse.   [The dog doesn't seem to mind - she hangs out in the sunshine in front of the studio.]

They'll nap in there for a while and then come out and scratch around somewhere else.


Bob's feathers.  So gorgeous. 

I could look at him all day long.

Saturday, March 22, 2014

More Lemon Honey Tea Stuff

Turns out we love the honey lemon tea concentrate that we made in the fall.    Especially with slices of fresh ginger dropped in the jars.  

Hello, sunshine!

I used an entire pint jar of the creamed honey we discovered in the pantry [see yesterday's post] and a bag of lemons.  I couldn't pour the honey, so I just spooned it in the jar between layers of lemons.   I got 2 1/2 quarts of lemony-honey goodness started.  It sat out for a few hours until the juices filled the jars, then I tucked them all in the fridge.

Friday, March 21, 2014

Creamed Honey


We harvested some honey from our deadouts in January and tucked it away in the pantry.

Now it looks like this. 

This is creamed honey.  

All honey will eventually crystallize - especially when temps get below 55 degrees  or so.  Creamed honey happens when the honey crystallizes into tiny, tiny crystals instead of the big rock candy type crystals.    So, creamed honey is named for its looks, not its content.  There is no cream in creamed honey.

What probably happened was that the honey in the combs was just starting to crystalize from the cold winter temps.  Then we brought it in and warmed it up and mixed it up and it ended up creamed instead.

Happy accident!   This stuff is shelf stable and spreadable.    Much easier to keep on a spoon.   It will melt nicely when heated or mixed with liquid.  [See tomorrow's post]

Thursday, March 20, 2014

Vinegar Mothers

These are vinegar mothers.   A red one for making red wine vinegar and a white one for making white wine vinegar.

They'll change colors if you add different wine to them.   I keep my separate so the flavor is separate. 


The mother usually floats on top of the vinegar.   It likes warm and dark.    As soon as you move it to the light, it sinks into the vinegar and in a few weeks another layer forms at the surface.

You can see that I've had this vinegar going for a long time.   That's a lot of mothers in there.    Each of them can be taken out and used to start new vinegar.   It doesn't take much mother to get a new batch going.


Some layers are really thin - I generally see thin layers in warm weather.


Some layers are really thick.   I see these during cold weather.

These mothers can be cut into very small pieces and given away to folks who want to make their own vinegar  [homemade is almost always best].

Interested in the details?   Here's how the whole vinegar thing works
I took all the extra mothers out of my jar and just left one very thin layer in.   I probably didn't even need to do that.  There are enough acetobacteria floating in the vinegar to start a new one.

I left the other mothers in a bucket to drain.   They're full of good vinegar and I want to keep as much of that as possible. 


Wednesday, March 19, 2014

Spring. At Last

The chives are coming up.    Either it's spring, or they're as tired of waiting for it as we are and have chosen to risk the wicked winter weather for a peek. 

In other spring news, we heard the first peepers last weekend.   On Thursday we drove by our local swamp and heard them up close and personal.   By Friday evening we could hear them from the house and on Saturday they were jingling like bells.  

Not a moment too soon.


Tuesday, March 18, 2014

How to Root Your Own Sweet Potato Starts

This is the time of year to start your sweet potatoes.   It's easier than you think.

You need: sweet potatoes, water and jars.

Put the sweet potatoes in the jars.  Fill the jars with water.  Put them in the window. Let them root.


They'll send out roots like these.   The warmer they are, the faster they'll root.

I've had mine in a window and it has not been warm.  The roots have been slow to show, but they're all rooting.  As soon as it warms up, they'll show a lot more action.  


They'll shoot up leaves like these.


And in June [in zone 5], you can stick them in the ground.    I cut them up so that each start has leaves and roots.

Sweet potatoes love warm. Wait until after the last spring frost to even think about planting them. 

Monday, March 17, 2014

Sap Runneth

One of the only things to get me through this winter has been the now steady drip, drip, drip of sap into the sap bags.    We're getting a bit more than a gallon a day from each tree as long as the temps go below freezing at night.    Some days, we get more.  


It's the freeze/thaw cycle that pumps the sap through the tree.


I let the sap bag get about 1/3 full and then empty it.  We've had it spill because it gets so full and I don't want to lose a single drop.    This week I've been emptying a couple of times a day - and one day we emptied three times.   We got close to 2 gallons that day.

I'm so looking forward to the boil.

Sunday, March 16, 2014

Dye Classes and Color Harmonies Class, June 2014

A lot of folks have been interested in dye classes lately, and I'm happy to announce that I have two on the calendar for this summer - plus, a color harmonies class as well!

On June 6-7, 2014 I'll be offering a cellulose dyeing class at the Hoosier Hills Fiber Festival in Franklin, Indiana.   In this class we'll be dyeing plant fibers [cotton, rayon, linen, tencel, bamboo] using cold water dyes.

The following weekend, June 14, 2014, I'll be teaching dyeing at White Violet Center at St. Mary of the Woods [just west of Terre Haute, Indiana].   In this class we'll be dyeing animal/protein fibers [wool, alpaca, llama, silk, soy silk, etc.] with acid dyes.  As a prelude to this class, I'll be teaching a Color Harmonies class in the morning with the dye class in the afternoon.   

Here are the full descriptions of the classes and links where you can register.  

1.  DYE CLASS: Fibers to Dye For, Cellulose Fibers [Plant Fibers]
2 part class: June 6, Friday 1-4 and June 7, Saturday 9-12
 
Hoosier Hills Fiberarts Festival
June 6-7, 2014

Johnson County Fairgrounds. Franklin, Indiana.
Yarn, roving, spindles, etc. [www.hoosierhillsfiberfestival.com]
Register at link above.

Learn how to dye plant fibers in rainbow skeins in your very own colors!  No previous experience needed!  This workshop will give step by step instructions on how to hand paint your own beautiful skeins of cotton, rayon, tencel, linen and other plant fibers using fiber reactive dyes.  Students may dye up to one full pound of yarn or fiber.  This is a two part class beginning the afternoon of Day 1 (with an overnight break so the skeins can batch) and finishing during the morning of Day 2.   Day 1:  Go over types of cellulose fibers and types of dyes, and safety procedures.  Mix the soda solution and dyes and paint skeins.  Skeins will batch overnight.   Day 2:  Rinse your skeins and go over how different types of fibers behave, common problems, resources and even a bit of color theory if time permits.  Students are welcome to bring up to one pound of yarn or fiber or a pre-wound warp to class.  Make sure it's cellulose/plant fiber.  


[Note:  This class is not for animal fibers.  These dyes do not work on wool, alpaca, angora, nylon, soy silk or animal fibers.] 

Register at www.hoosierhillsfiberfestival.com

Email me if you have questions:   robin at morenna dot com 


2.  CLASS:  Color Harmonies
3.  CLASS:  Dyeing on Protein Fibers with Acid Dyes
June 14, 2014
White Violet Center, St. Mary of the Woods College. Terre Haute, Indiana.
Register for classes at www.whiteviolet.org.

Morning:   Color Harmonies: Color is one of the most magic aspects of art.  This class will help you take the mystery out of deciding which colors go together and how.   Topics will include basic color theory, using color tools, wheels and books, classic color combinations, etc.   Expect to laugh a lot as you practice putting colors together and using your new skills.  

Bring with you:  Photos or things with color combinations that you really like, photos or things with color combinations that you really don’t like.   Feel free to bring whatever color tools, books, swatches, yarn, etc you already have that you’d like to practice working with.

Afternoon:  Dyeing on Protein Fibers with Acid Dyes:
Explore the use of acid dyes to turn your 
stash of ‘boring’ protein yarns and fibers into designer yarns and fibers that you won’t be able to wait to knit, weave or spin up.  You will learn how to put several colors onto a skein to make variegated yarns as well as learn to do immersion [single color] dyeing.  We will dye with acid dyes [very safe and mild!] on wool, mohair, alpaca, soy silk, nylon or silk  fibers.   Students may bring white or natural yarns or bring colored yarns to overdye.   Overdying is a wonderful way to put pizzazz in a project.

[Note:  This class is not for plant fibers.  These dyes do not work on cotton, tencel, bamboo, rayon, linen or other plant fibers.] 

You may register for one or both classes at www.whiteviolet.org
Email me if you have questions:   robin at morenna dot com  


Saturday, March 15, 2014

More Rural Redneck Poetry

And now for your reading pleasure - another rural haiku.

Because we love rural redneck poetry.

Plus haiku is dead easy.    Here's your creative challenge for the day:  Leave me a haiku in the comments.   No doubt you'll far outshine me.

*clears throat and waits for the room to quiet...*


Snow drops from the sky
With freezing rain, sleet and ice.
Still, arise snowdrops.


The end.  

Friday, March 14, 2014

One Wall Up


The first wall of the new construction is up.  Eric built the wall flat on supports at 'floor' level inside the new addition and then stood it up.  Then he end nailed it in.  

That's what the very tall unit in front of the wall is for.   He ran a rope from a tree, up and over the 'crane' and tied it off to the top of the wall, then hoisted it that way. 

The crane is bolted to the rim joist in front of the room and there were three extra 2x4 supports so that the thing wouldn't pivot under the load.
It worked like a charm.  Eric did most of the lifting, then I steadied the rope while he pulled the slack out of the last little bit to finish raising it.    We'll have to do that for a couple of the other walls that are built in places where the foundation is too tall to build on the ground next to the house.

You can see how much higher the new floor will be compared to the old 'sunken' living room.    I am greatly looking forward to having a house where all the floors are level and go smoothly from room to room on a floor.   Also, I'm looking forward to 8ft ceilings instead of 7ft ceilings.  

Yay!! Our first new wall!    And just in time for our 25th wedding anniversary today.  

Thursday, March 13, 2014

Shed in Field

I don't know what it is about these old falling down sheds that catches my eye.

Maybe it's the blue-ish wood agains the orange-ish grass.

This old shed keeps leaning backward.   It won't be long until it's all the way down.   It looks like it needs a nap.


Wednesday, March 12, 2014

Ice

The creek ice is melting away.   We've never seen it so thick as we have this year.   Click these pics to blow them up big enough to really see how beautiful it is.


This ice looked like pillows from Christmas until this week.  


This section has wiggly squiggly layers and was our favorite as far as weird ice goes this year.


We loved the swoops and icicles in this section.


Icicles under every rock along the creek.  

They're lovely, but I'll be glad to see them leave.

Tuesday, March 11, 2014

Egg White Only


Here's the range of eggs we've been getting lately.    I like the colors.   The big eggs were laid by [from L to R] Americauna [red], Barred Rock, Buff Orpington, Americauna [black], Saxony duck.

That tiny egg - How cute is that?   We have no idea who laid it and we don't think it was a song bird - it was far too cold for birds to be nesting when we found this in the nesting box in the coop.   The spots indicate it's probably from a Barred Rock. 

Whatever it is, it's probably an egg-whites-only egg.  We get them once in a while.  Like practice eggs.  


Monday, March 10, 2014

Sol's Berry Farm

We live near a bump in the road called Solsberry.    Most people assume that 'Solsberry' is a corruption of Salisbury, named after the city in Wiltshire, England, and that we dumb Hoosiers just couldn't spell. 

They have a point - the town of Gnaw Bone, Indiana is indeed a corruption of the French name, Narbonne. 

Hey.  We don't speak French in Indiana.

Except maybe in French Lick.  Which was named because a French trading post was set up near a salt lick.  But probably, no one has spoken French there in a long time.

Except maybe the high school French class.   And maybe those international students from IU who went to see the casino. 

And my friend in Lafayette [which was named after a French guy].

At any rate, in our case, Solsberry was not named for Salisbury.   It is named for Solomon Wilkerson. 

You see, Sol took advantage of the plethora of wild berries around here and picked and sold them.   People loved Ole Sol's berries.

Yep.   You see where this is going, right?

Sol is memorialized in the Solsberry Cemetery, where you can see his original limestone gravestone [above] and where they've put this beautiful plaque telling his story.   This is what the plaque says:

"Solomon Wilkerson  1800 - 1875. 

Solomon Wilkerson founder of Solsberry, was born in North Carolina in 1800 and moved to Monroe County, Indiana, in 1820 where he married Polly Anderson in 1833.  In 1835 they moved to Greene County, Indiana and erected the first house in what is now known as Solsberry.

In 1850 Solomon platted the site for Solsberry.  It was divided into 34 lots, each of them being 66' x 132'.  The streets were 66' wide and the alleys were 12' wide.   The street running north and south was named Washington, and the street running east and west was named Main.  Because the blackberries and blueberries were plentiful in the area, Solomon picked and sold them; hence the town was name for 'Ole Sol's berries'.

Solomon was held in high esteem, serving as Justice of the peace for several years.  In 1875 he died after being thrown from a horse near Bateman Ford, on Richland Creek, northwest of Solsberry."

Here's a closer up pic of the original marker.  It's a good thing it's protected - the limestone is melting away with time and exposure to the elements.

Sol has a facebook page, where you can go see a picture of him.  

Here is an old map of Greene County from 1879, just 4 years after Sol died.   See if you can find Bateman Ford on Richland Creek.


There's not much left of the town except an intersection and a cluster of houses.   We have a post office and a fire station and Yoho General Store.   [You ought to stop by Yoho and get some ice cream - it's tasty!]  The folks who live here are super friendly so wave when you come to town.  You'll get a smile and a long chat if you have the time.


Sunday, March 9, 2014

Spring Means Eggs

We have five hens and seven ducks.   Plus a couple of roosters and four drakes.  

They poop a lot.  

And in theory, they lay a lot of eggs.   In a perfect world, we'd be getting a dozen eggs a day.

It's not a perfect world.  

During the winter they take a break from laying.   We used to think it had something to do with the light, but after this year, I'm pretty sure it has a lot more to do with what's available to eat.   All the snow cover this year has meant slim pickings on the ground.   We feed them table scraps and chicken feed, too, but they won't lay until they can scratch around in the yard and creeks a bit, too.   

Finally,  finally!  they've started to lay again.   We're getting about four eggs a day and they seem to be picking up speed.  Fast. Yesterday we found three duck eggs in the chicken yard frozen in the ice.   The silly things would prefer to lay there than in their nests in the coop.   The warm eggs melt enough ice to cradle them, then the ice freezes solid and we can't get them out without breaking them [though they usually freeze, swell and break on their own first.]

This blue egg is from Larkus, one of our Americaunas.   Her eggs are very thin shelled and lately have had a ring of tiny bumps around the middle.  It's likely that when things green up again, the bumps will go away and her eggs will be smooth again.  

Related Posts Plugin for WordPress, Blogger...